3D printing may not be entirely mainstream just yet, but it sure has made strides in recent years … most surprisingly, IKEA for a recruitment campaign. Probably the tastiest job interview?
Furthermore, cost of printing has also come down, with readily available for home use. Which prompted IKEA to launch the print-on-demand FLAMTRÄD range (only available in IKEA Germany.)
I’ve also seen more and more 3D printed IKEA hacks including this fabulous . But what I’m most happy to see is how 3D printing offers new ways to construct and reconstruct IKEA furniture — giving them a new lease of life.
Let’s look at how 3D printing salvages a set of old table legs and extends the life of the LACK table.
1. 3D printed upcycled coffee table
We built this because we moved to a new house and we bought a second hand IKEA desk for very little money.
However, we had no use for the legs in our setup and I found it wasteful to throw them away. We did however still need a coffee table, so I figured 1+1=2.
The printing time is approximately 18 hours and without the legs it cost about 35 euros. (30 for the tabletop, 4 euro in printing material, and 1 euro for a couple of wood screws.)
IKEA items used:
4x IKEA GODVIN legs cut to 380mm (they seem to be discontinued but still available on second hand websites.)
Other materials:
50CM table top (I use 19mm multiply with HPL top and bottom layer)
1x M8 nut
1x M8x25 bolt
Wood screws to mount the mounting plate to the table top. (You can use the ones that came with the legs depending on the thickness of your table top)
Printed parts:
1x 3D printed leg brace/table mount
1x 3D printed spacer ring
4x 3D printed feet
Using IKEA legs in 3D printed coffee table
First, we printed the parts — feet for the legs to cover up the cut section. And a half-spherical base to attach the legs to the table top. I used a Prusa Mini to print the parts using PLA at 0.2mm layer height and 30% infill.


After that, we disassembled the GODVIN legs from the mounting plate and cut the legs down to 38 cm using a saw for metal. Be careful not to cut off the threaded section as you’ll need it to screw into the base.
Next, we pushed the 3D printed feet into the legs with a bit of force. Moving on to the 3D printed base, we inserted the M8x20 bolts which will later hold the legs in place.


The next step is to insert the mounting plate that came with the GODVIN into the spacer ring. The M8 nut goes to the back of the mounting plate. Align mounting plate and spacer in the center of the tabletop. Screw mounting plate to the table top. Use M8 center bolt to attach the legs and base to the tabletop.


And our 3D printed coffee table is done.


I like the sleek ‘Scandinavian’ looking design (fits with the IKEA theme :)). My girlfriend thinks it looks like an UFO that sends beams to the ground.
~ by Niels
2. Print It Yourself (PIY) end cap for IKEA LACK table
If you want to shorten the legs of an IKEA LACK table, you might want to put an end-cap on the leg after you have sawed it off. The leg is hollow so it will need something to plug the hole and stabilize the leg. This is a 3D printed end-cap that you can download and print on your 3D printer yourself.

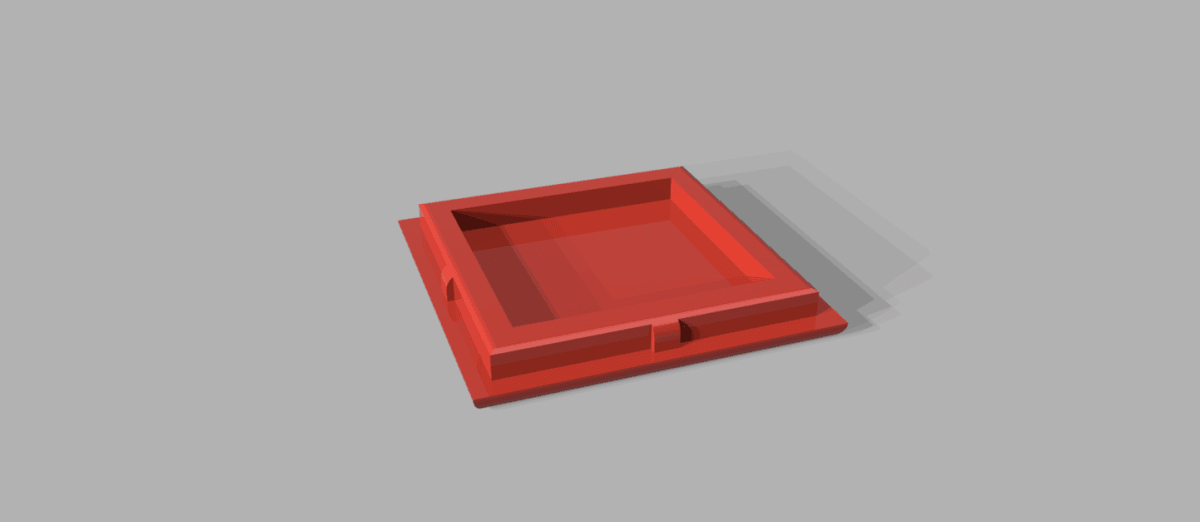
This end-cap is press-fit so you won’t have to glue it. Just Use (The) Force and push it in.
The STL and STP files are available from .
~ by Borud
3. Height risers for LACK table legs
The LACK table is one of the cheapest tables around and can be seen in many households. If you however find this table to be too short, then this nifty hack will be just the thing for you.

Materials:
1 x
4 x 3D Printed LACK Table Feet ()
4 x O-rings (20mm inside diameter and 3 mm thickness)
3D printing IKEA LACK leg risers
Print the files at a 3D Hub in your neighbourhood or on your own printer. ABS would be the preferred way to go for durability reasons. Just make sure that you do not hold back on the amount of infill (do not go under 20%) since your table legs should be holding quite some weight.
If you want to take it to the next level you could change the height of the legs with this and match it to your taste. Once printed, nudge the O-rings and screw the table feet into place, but be gentle, the LACK table is not known for its structural integrity.
~ by Obijuan
See more .
The post appeared first on .
Related Posts