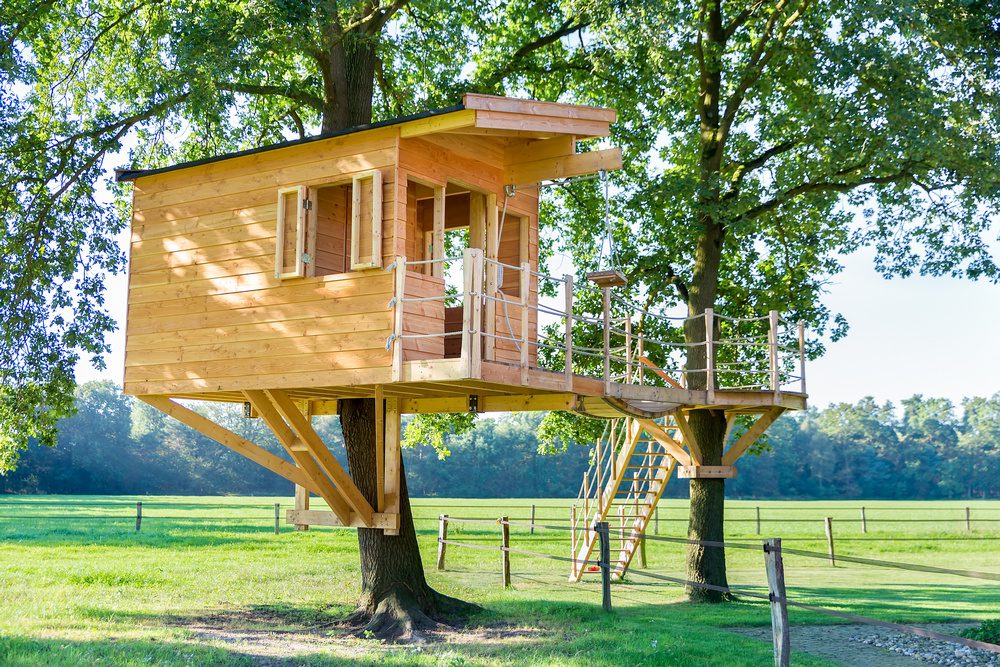
Getting your own tree house can be a rewarding experience that brings so much joy to the entire family. Not only does it provide a playhouse for your kids, but it will also make a great hang-out spot for everyone. However, building a treehouse is more than just carpentry. The building process tends to be complicated depending on the type of design you’re going for.
So, if you’re a Do-It-Yourself (DIY) kind of person who has never done this before, below are nine easy steps that will guide you to the completion of the treehouse of your dreams.
- Stick To Building Codes
The construction of any structure is no longer a smooth process due to the legalities. In the past, were not required for the erection of tree houses on family property.
However, with the introduction of modern treehouses fitted with amenities, a building permit may be required depending on your state guidelines. So, before you start construction, be familiar with the building codes in your area.
- Choose A Tree
The ideal tree for your treehouse is one that’s healthy and sturdy enough. Therefore, avoid trees that are either too young or too old since they could easily fall apart. Insect-invaded trees and those with dying or no leaves, and other signs of decay are not suited because they won’t be able to bear the weight of a treehouse.
For the specific tree for your treehouse, consider hardwoods like oak, maple, beech, apple, and ash. You can also opt for softwood like hemlock. These are suitable due to their load-bearing capacity.
For a regular-sized treehouse, your tree trunk should be at least 12 inches in diameter, but if you want a larger house, the diameter should be significantly bigger. Branches are also critical. Your tree should have hefty branches that splay out to provide adequate support and anchor points to secure the base of the treehouse in place.
- Create Or Buy A Design
Deciding how you want your tree house to look is the next big step. If it’s a family treehouse, allow input from all members.
Keep in mind that the design will be heavily influenced by your budget. A fancy tree house design with added stories will be more expensive to execute due to added materials compared to a simple treehouse that uses fewer materials. However, if you are not ready to go through the hassle of creating your own design, you can access a ready-made design.
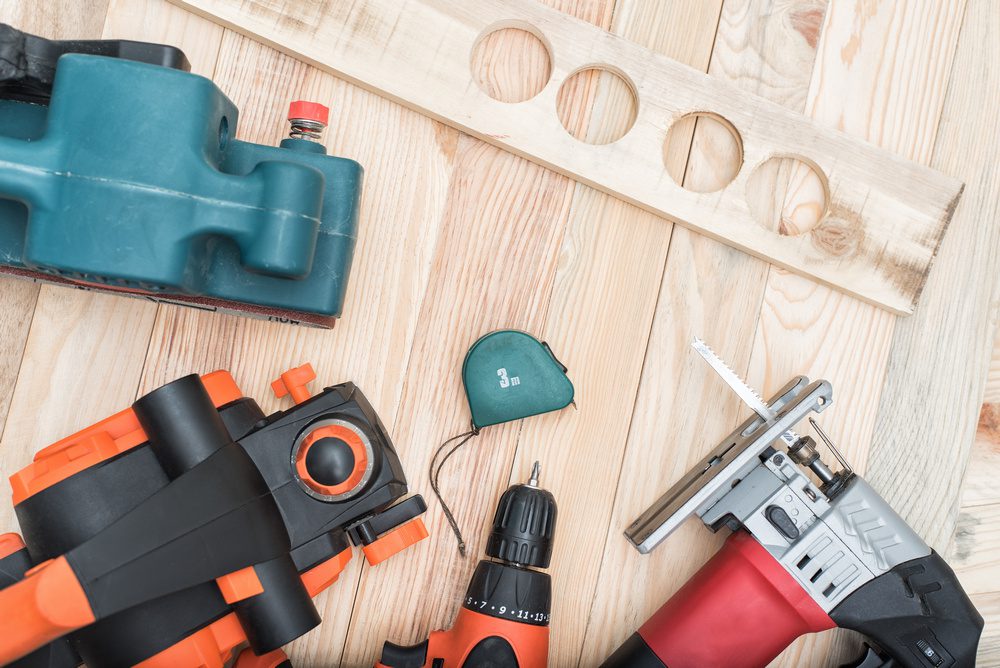
- The Right Power Tools For The Job
Once you have your construction materials, gather your tools and keep them within easy reach. Aside from hand tools such as hammer, square, level, adjustable wrench, and a tape measure, you also need power tools. As they’re more efficient and precise, you can get the job done in less time.
Here’s a list of power tools that are essential for your treehouse building project:
- Cordless Drill. This is an electric drill that you can use for drilling holes in your construction material and for inserting screws and other threaded fasteners.
- Magnetic Drill Bit Holder. When you’re drilling while standing atop a ladder or a tree branch, using a can really help keep things at hand without having to reach into your pockets every time for drill bits.
- Jigsaw. A jigsaw is a saw with a narrow blade that you can use to cut curves and other shapes in wood.
- Miter Saw. If you want to make angled cuts without breaking a sweat, use a miter saw.
- Table Saw. For ripping wide boards, your best tool is the table saw. You can also make crosscuts using this power tool.
- Router. Your power tool for rounding the edges of a piece of wood is the router.
- Build The Platform
With the initial preparation done, it’s now time to build the platform. You must ensure that the frame is well-supported by interior beams. Then, hoist the platform at a height that is suitable for the kids who will be using it.
The platform should not be constricting your tree. There should be enough space for your tree to grow. This prevents the bolts from weakening once your treehouse has been erected for quite some time.
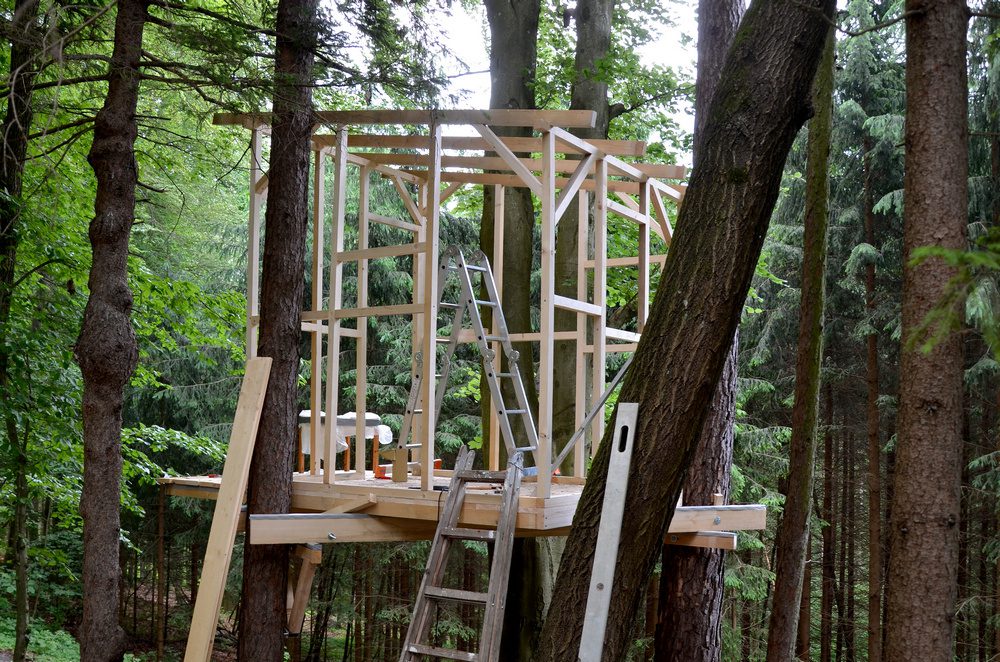
- Add Posts Or Braces
To ensure that your treehouse can withstand strong winds and bear the weight of your kids, you need to add posts or braces for extra support. You also need to consider the natural flexibility of trees, lateral movement caused by flexible joints, and rotational movement around the trunk.
With that in mind, lay beams across the branches either from above or below. Afterward, use plywood for the floor and screw it down into the support beams. This will reinforce the flooring system and prevent weakening. Bear in mind that if the supporting structure is not sturdy enough, your treehouse will not be safe for your kids to use.
- Attach The Floor To Supports
Now that you’ve secured the platform with posts and braces, you can now add the floor. Even though treated plywood is the top choice for flooring, there are other options such as:
- Playmat foam puzzle tiles
- Reversible wood grain foam tiles
- Economy foam mats
- Rubber flooring mats
- Add House Features
Once you’ve built a sturdy foundation, you can work on the frame of the treehouse. Remember to allow space for windows and doors when putting up the walls.
You may also install railings to keep small kids safe. To make your treehouse roomier and even more delightful, add a porch.
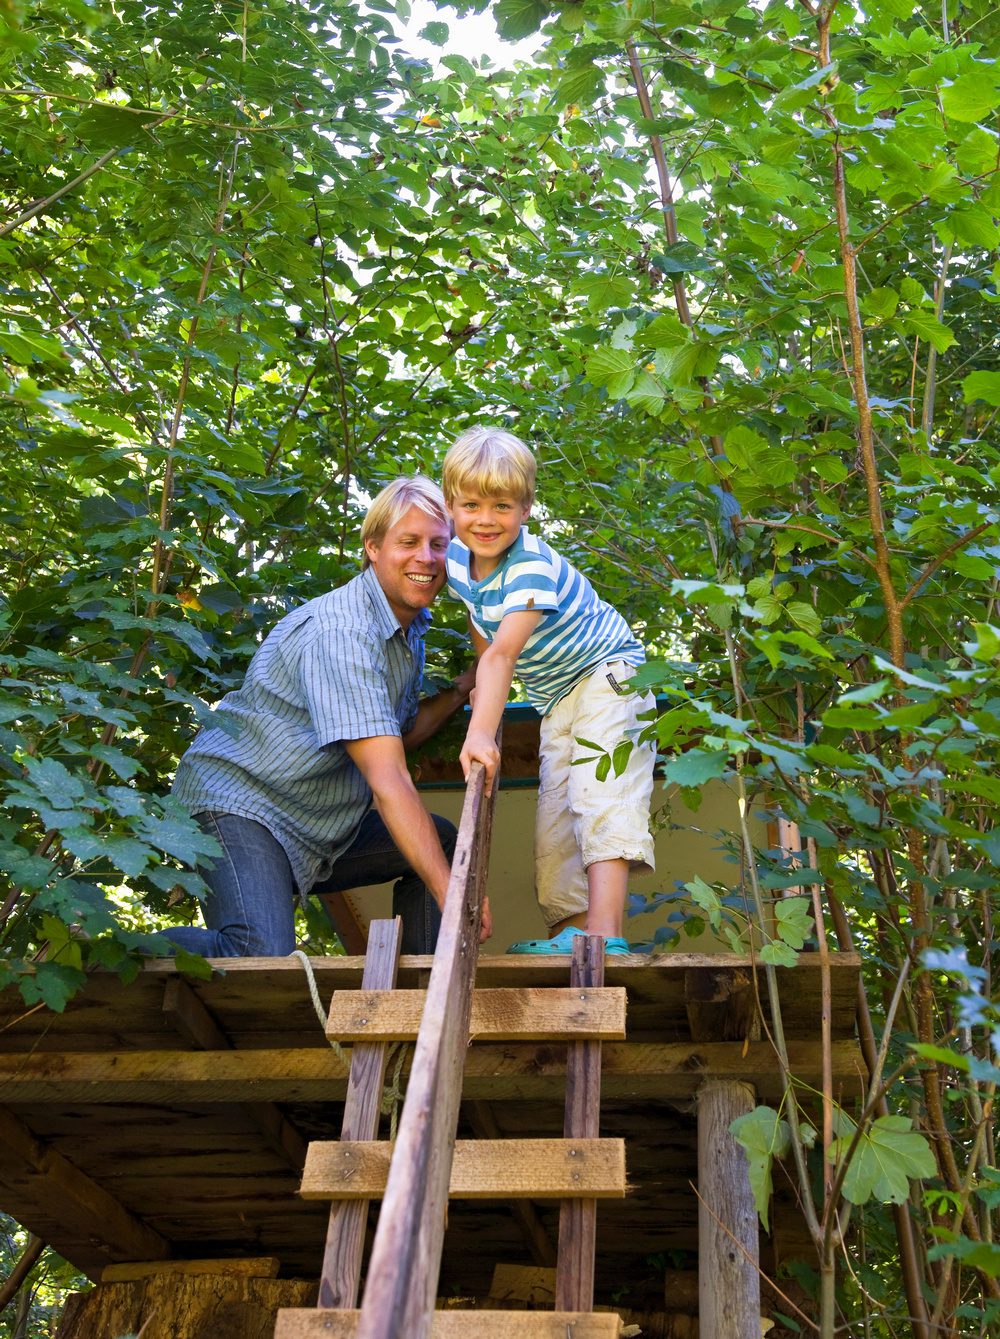
- Add A Ladder Or Entrance
Now that you’ve completed the treehouse itself, you can now install a ladder to access it. If you want a physically demanding entrance, you can install a rope ladder or a climbing wall. However, if you have young kids who can’t climb, a simple ladder will suffice.
Finally, add finishing touches to your treehouse to give it character and make it unique. One trick is to place themed pieces that match your kids’ preferences.
Bottom Line
A treehouse is guaranteed to make everyone happy, regardless of age. Building one may be challenging, but the result——is worth all the effort. So, gather your tools and start creating a great addition to your home using the easy steps outlined above. Have fun and let your creative juices flow. Good luck!
Related Posts